Search This Site

Custom Search
|
 |
|||||||||
Installing A Graphics Card
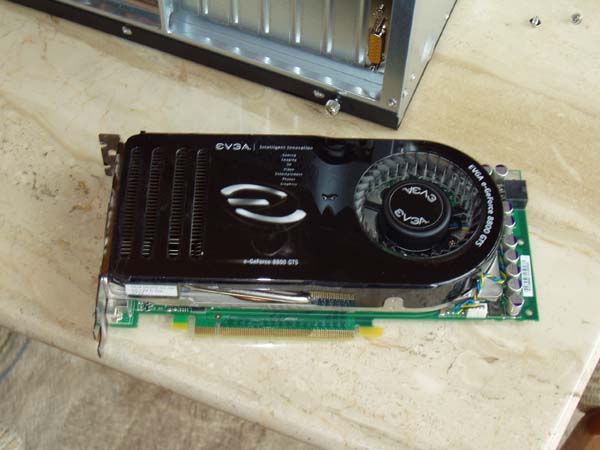
Compare Graphics Cards and Buy the Best You Can AffordInstalling a graphics card is one of the last steps in building your computer. Compare graphics cards and use the best graphics card (cheap graphics cards can sometimes lead to graphic card problems). Our next step is installing a graphics card. Actually, we'll cover all peripheral cards here, with the most common being...
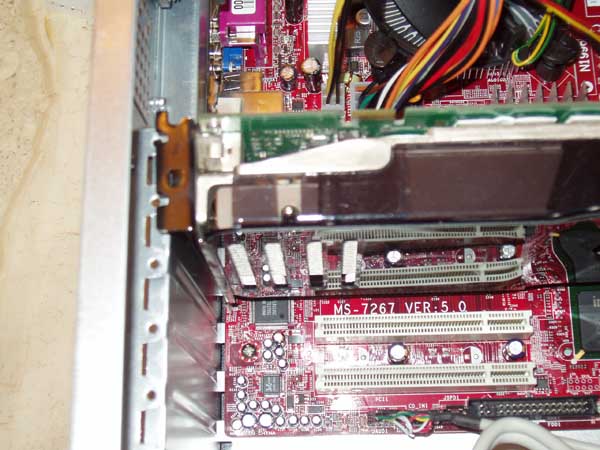
There are other types of cards you may use, and the installation for them will be very similar to a graphics card install. It may be that you do not have any peripheral cards if you got onboard video with your motherboard. If that is the case, you can just skim over this section, and keep it in mind if you should later buy a graphics or sound card. Note: PCI-E slots come in sizes that include: x1, x2, x4, x8, and x16. These all refer to the communication speed of the slot. There are 2 types of cards to cover here, graphics, and all others. Motherboards now come with PCI-E slots. See Labels "A, B, and C" on the motherboard diagram. "A" is a PCI slot. These are still in use today, but in the future will be made obsolete. They are being replaced by "C", the PCI-E x1 slot (as well as x2, x4 etc.). These allow faster communications with the motherboard. Finally, slot "B" is the PCI-E x16 slot that will be used for your graphics card. You may have noticed that the motherboard in the above link has 2 of the x16 slots. This is used for SLI (Scalable Link Interface). This allows you to install 2 graphics cards to really crank up your graphics power. Usually only gamers will go with this type of setup, as it can get quite expensive. The board we are using for this demonstration only has a single PCI-E slot. So, installing a graphics card entails...
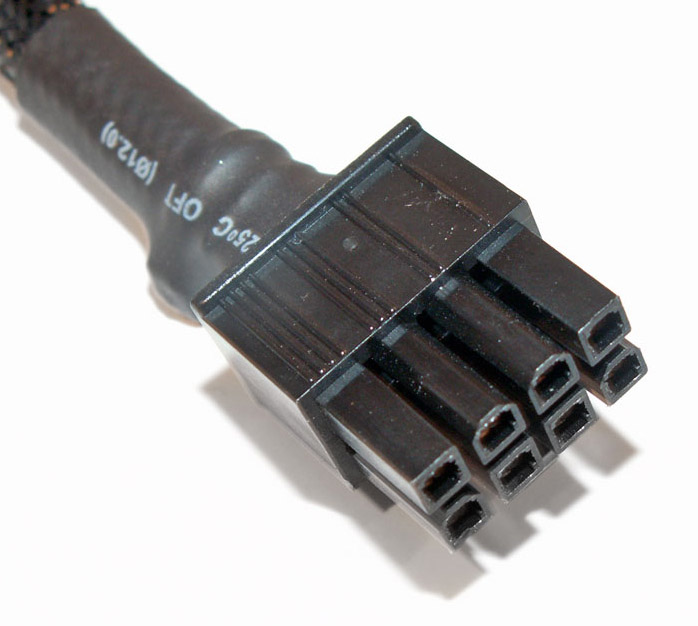
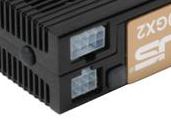
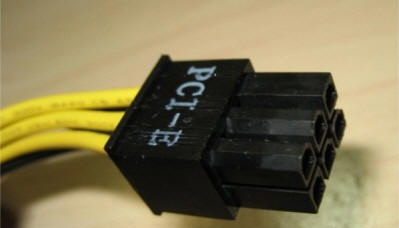
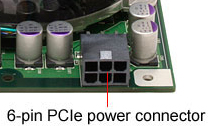
The power supply that you researched to buy with this card should have the correct connector. Some will include an adapter that connects 2 of the 4 pin connections into a single 6 pin connection. Regardless of the type of connection, run a wire from the power supply and hook it into the card. Please refer to your graphics card manual for more detailed information on your connections. Note: Do not share power cables that your graphics card uses with anything else. Unlike your computers' fans, graphics cards take a lot of power, and don't like sharing with others.
That's it for installing a graphics card. If you encounter graphic card problems with the set up, simply use this page as a checklist and make sure you have done the installation correctly. In some cases, problems may be a result of an inoperable card; keep the receipt and packaging when you buy it and make sure you return to the vendor within in the warranty period. Other cards you may have will be installed the same way. Simply identify which type of slot you need, PCI, x1, x4, x8 and drop the card in. Some cards, such as Ethernet cards and some sound cards, do not require any power connections. Others will; if so, run another power cable from the power supply. Check the manual that came with your peripheral card for the correct installation procedures. Moving on, the next step is the initial boot up... Step Fourteen - Final Preparations
Return to Build Your Own Computer Homepage from Installing A Graphics Card Return To Build Your Own Computer Homepage |
Here's What Visitors Have to SayAwesome site and very useful information that is to the point... Thank you for the hard work that you put into this site. This site is the best site on the net far as I am concerned and I will be refering this site on to my students. Once again, great site!!! Kristian, IT instructor from the U.K. Thank you for helping me to fix my pc motherboard led indicator. Dietram, Tanzania Hi, I found your site and all the wonderful tutorials. This is just the thing I'm looking for. Davey, Canada The hardest part of the build, I thought, was the wiring. And here your guide really shines. Most of the other computer build guides ignore it, or just say 'connect all the wires properly'. So thanks for the details! Donald, Netherlands |
|||||||||
|


|
||||||||||
|
| Home Page | Motherboards | CPU | Memory | Computer Drives | Graphics | Power Supply
| Input Devices |
| Output Devices | Cooling | Cases | Modems | Troubleshooting | Computer Guides | Buying Guide | | Free Games | Computer Software | Green Computers | Ultra Mobile PC | Glossary | Builder's Corner | | Site Index | Contact Us | Advertising | Return to top
Copyright© 2008-2014. Voice Marketing Inc. All Rights Reserved. Read our Privacy Policy. |
||||||||||